A border walk can feel unreal until you’re there. I like that this tour is run by retired officers with real frontline backgrounds, so the facts come with context, not just a script, and I also like the strict, no-shopping format that keeps the day focused. A key consideration: it’s weather-dependent, and your clearest-view stop (Odusan or Dora) is chosen based on visibility, so conditions can shape what you see.
You’ll spend real time at the places that matter—especially the Third Tunnel and the observation deck chosen for the day. You also get roundtrip transfer from Seoul, which makes this easier than trying to piece the DMZ together yourself. The pace is efficient, but it’s still a 6–7 hour commitment including bus time, so plan your other sightseeing accordingly.
In This Review
- Why This DMZ Tour Feels Different From the Usual Bus Ride
- Key Stops and What You’ll Actually Get From Each
- First Stop: Entering the DMZ With ID Checks and War-Era Landmarks
- The Third Tunnel: When History Stops Being Abstract
- Dora Observatory vs. Odusan Deck: How They Pick the Best View That Day
- Mangbaedan: The Symbolic Side of Separation
- The Jangdan Station Steam Locomotive: A Short Stop With a Clear Story
- Bridge of Freedom: Photos Are Easy. Meaning Is the Hard Part.
- Time, Pace, and What a Half-Day Really Means Here
- Price and Value: Why $45 Can Still Feel Worth It
- Weather, Visibility, and Day-of Flexibility
- Who Should Book This DMZ Tour (and Who Might Want Something Else)
- Should You Book This DMZ Tour?
- FAQ
- How long is the DMZ tour from Seoul?
- What does the $45 per person price include?
- Is lunch included in the tour?
- Will I see both Dora Observatory and Odusan Unification Observation Deck?
- Do I need a passport?
- What physical effort should I expect?
- What happens if weather or visibility is poor?
- Are there shopping stops?
- What if I cancel?
Why This DMZ Tour Feels Different From the Usual Bus Ride
This isn’t a slow, generic history lesson. You get guided, high-contrast explanations tied directly to what you’re looking at—bridge, tunnel, and viewpoints—plus the guide can answer questions in plain language. If you like your travel with a bit of seriousness and a bit of humor, you’ll probably click with this format.
The “retired military officer” approach is the big draw. In this tour lineup you may meet guides described as Special Forces and Iraq war veterans (like Agent SJ), former artillery commanders (like Agent Tiger), and an infiltration-tunnel expert (like Agent Eddie). On the same operation, you may also encounter English-speaking guides such as Julie, Dylan, or Jay, and multiple reviews emphasize the same thing: crisp explanations, quick checkpoint handling, and lots of time for questions.
Key Stops and What You’ll Actually Get From Each
- The DMZ entry experience: ID checks and immediate context before you even step into the border area
- Third Tunnel walk: a tight, physically real passage that makes the strategy feel tangible
- One chosen observatory stop: Odusan or Dora picked by real-world visibility and weather
- Mangbaedan altar visits: symbolic tribute sites that frame separation beyond politics
- Jangdan Station locomotive: a quick but memorable war-era artifact tied to the Korean War’s push and blockade
- Bridge of Freedom moments: short, high-impact viewpoints and photo time with guided meaning
A few more Seoul tours and experiences worth a look
First Stop: Entering the DMZ With ID Checks and War-Era Landmarks
The day starts with DMZ-area entry procedures, including an ID check before you move into the historical sites. This matters because it sets the tone fast: you’re not just sightseeing; you’re going through a controlled, high-stakes area.
From there, you’ll look at the Bridge of Freedom and the Mangbaedan Altar area tied to the Korean War. Even if you’ve read about division before, standing there with a guide who can explain what these landmarks were meant to communicate changes the way you see them. It’s the kind of stop where the details help you connect the dots instead of just collecting photos.
What to watch for: the schedule is tight. If you’re the type who needs a slow pace or lots of wandering time, you might feel slightly rushed during transitions between checkpoints and viewpoints.
The Third Tunnel: When History Stops Being Abstract
The Third Tunnel is the main “your body understands it” stop. You’ll do a walking course into the tunnel, and the tour description notes tight dimensions (around 1.95 meters high and 2.1 meters wide). That isn’t just trivia; it changes the feeling immediately. You move differently in a space like that, and it’s easier to grasp why tunnel strategy was taken so seriously.
The time here is long enough to matter (about 40 minutes), and it’s guided. A strong guide will explain not only what the tunnel is, but why this kind of infiltration attempt mattered to both sides at the time. Reviews specifically highlight guides such as Eddie (including his background as a tunnel briefer) sharing real, personal-style perspective, including DMZ-related stories told in context.
Practical tip: wear shoes you trust. This is a tunnel experience, not a “cute outfit for photos” stop.
Dora Observatory vs. Odusan Deck: How They Pick the Best View That Day
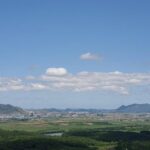
One of the smartest parts of this tour is that you don’t get stuck with a single default viewpoint. The operation checks weather, visibility, and live CCTV each morning, then chooses either Odusan or Dora Observatory based on which gives the clearest view into North Korea that day.
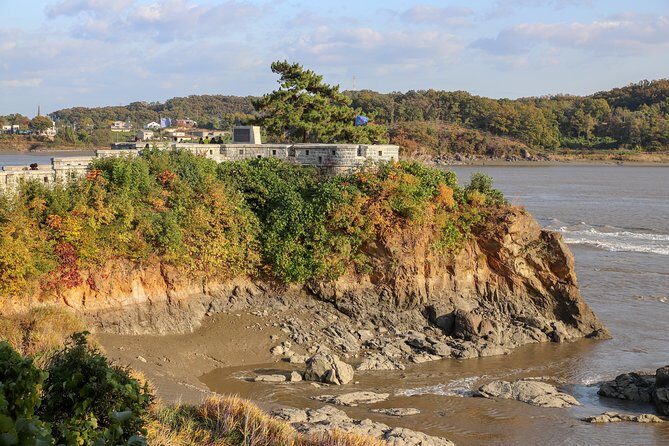
You’ll see what the tour calls key North Korea-region targets from the selected observatory. With Dora Observatory, the focus is on the northern-most point of the western front and the chance to view places such as the Gaeseong Industrial Complex and Songhaksan Mountain in a single sightline. With Odusan Unification Observation Deck, the emphasis is proximity—described as about 2 km from North Korea—and the claim that it’s one of the closest points from Seoul where you can clearly view North Korea.
Why I like the decision system: it respects reality. Some days smog and weather blur distance. This tour format tries to reduce that disappointment by selecting the better option on the day. Even when visibility is limited, guides are prepared to explain what you’re seeing and the distance involved, so the time still lands.
What to keep in mind: you’re paying for the day’s best chance at a clear view, not a guaranteed perfect view. If visibility is poor, your experience can still be valuable, but your photos might not look like the sharpest brochure shots.
Mangbaedan: The Symbolic Side of Separation
After the tunnel and the observatory portion, the itinerary includes Mangbaedan stops designed for reflection. Mangbaedan in Paju is described as a symbolic altar where separated families pay tribute to ancestors facing north across the DMZ.
This isn’t political theater. It’s a reminder that the conflict isn’t only about borders on maps; it’s also about people trying to stay connected across an enforced divide. A good guide keeps this grounded by linking the symbolism to the lived history of separation.
This stop is brief (around 10 minutes for Mangbaedan in Paju in the itinerary details), so you’ll want to treat it like a quick reset. Stand there, face the direction you’re told, and let the meaning land before you move on.


The Jangdan Station Steam Locomotive: A Short Stop With a Clear Story
You’ll also make a quick stop for the steam locomotive at Jangdan Station of the Gyeongui Line. The tour description frames it as a symbol of war and division, pointing out that the locomotive was destroyed by U.S. forces in 1950 to block the Chinese advance while transporting UN supplies northward.
Even with limited time (about 5 minutes), this kind of artifact works well on a guided DMZ day. You’re not just seeing an object—you’re hearing how it fits into the broader “movement north, blockade, division continues” chain of events. It’s a snap stop that gives your brain another anchor point for what you’ve already learned.
Bridge of Freedom: Photos Are Easy. Meaning Is the Hard Part.
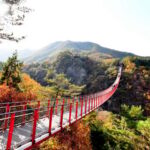
Bridge of Freedom appears as both a named landmark in the earlier DMZ portion and again in the stop list as a brief photo/view stop. That repetition is useful. The first time, it’s often about context. The second time, it’s about letting the meaning stick while you look again.
The bridge carries weight because it’s been tied to negotiations, visits, and the very concept of contact that’s been interrupted. With a military-background guide, you’re likely to get specifics on what has happened here historically and why the location matters.
Practical note: if you’re aiming for photos, be ready to move when the group moves. This tour stays scheduled for a reason.
Time, Pace, and What a Half-Day Really Means Here
The tour is advertised as half-day, but the duration is listed as about 6 to 7 hours including traffic. That’s normal for DMZ tours, and it’s also why planning matters. You’ll likely want to treat this as your main outing day and keep nearby activities simple afterward.
It’s also described as a compact experience: half-day, no shopping, and a schedule built around the key DMZ elements. That’s a big value point for me. You’re not buying hours of bus time in a mall. You’re paying to be at the border area and at the sights that carry meaning.
Group size feel: it’s described as a private tour/activity, meaning only your group participates. At the same time, there’s a minimum number of guests to proceed, so if you’re booking at the last minute during low season, you might see schedule changes.
Price and Value: Why $45 Can Still Feel Worth It
$45 per person isn’t cheap-cheap, especially if lunch isn’t included. But when you look at what’s included, the value starts making sense:
- Licensed professional guide
- Roundtrip transfer from Seoul
- Admission fees to the DMZ sites
- One observatory chosen for the day’s clearest view
- A route built around the signature DMZ stops, not filler
If you tried to DIY DMZ access, you’d spend time figuring out checkpoints, permissions, and transport—and you’d still need guided context to make the day coherent. Here, you get structure plus a guide with military expertise, and that combination is what turns “a place on a map” into a day of understanding.
Weather, Visibility, and Day-of Flexibility
This is one of those tours where weather isn’t a minor detail. The tour requires good weather, and if poor weather cancels the experience, you’ll be offered a different date or a full refund.
Even when the tour runs, visibility can change what you see from the observatory. That’s why the operator chooses between Odusan and Dora based on real-time conditions. I like that approach because it reduces the feeling of being locked into the “wrong” viewpoint on a bad day.
Pack common sense: bring layers. Even on clear days, the border area can feel cooler or harsher than central Seoul, and tunnels don’t forgive flimsy footwear.
Who Should Book This DMZ Tour (and Who Might Want Something Else)
Book this if you want a DMZ visit with real framing. The retired officer guide format is ideal if you like precision: definitions, distance, why certain points were targeted, and how military reality shaped decisions.
It also suits you if you’re short on time but still want the major stops: DMZ entry context, the tunnel walk, and one best-view observatory option.
Consider skipping or pairing with something lighter if you dislike structured schedules or you need lots of free time. The tour is designed to move. It’s also described as requiring moderate physical fitness, especially because the Third Tunnel involves a walking course in tight space.
Should You Book This DMZ Tour?
I think you should book this DMZ tour if you’re after meaning, not just stamps and photos. The biggest reason is the guide format: retired military backgrounds like SJ and Eddie-type expertise (plus guides like Julie or Dylan in some departures) turns the route into a guided explanation of how division works in practice.
If you’re flexible on observatory choice and accept that weather can shape views, the trade-off feels fair. You’re paying for the day’s best chance to see North Korea from a managed, safe route, plus a guide who can explain what you’re looking at in plain, practical terms.
If your main goal is a relaxed, wandering sightseeing day, choose a different Seoul activity. This one is focused, scheduled, and serious in the best way.
FAQ
How long is the DMZ tour from Seoul?
The total duration is listed as about 6 to 7 hours, including the time spent traveling by bus.
What does the $45 per person price include?
The price includes a licensed professional tour guide, roundtrip transfer from Seoul, admission fees to the DMZ stops, and entry to one observatory (either Odusan or Dora Observatory) chosen for that day.
Is lunch included in the tour?
No. Lunch is not included.
Will I see both Dora Observatory and Odusan Unification Observation Deck?
No. The tour includes one observatory stop, and the operator chooses either Odusan or Dora Observatory based on the day’s weather and visibility.
Do I need a passport?
Yes. A current valid passport is required on the day of travel.
What physical effort should I expect?
The tour notes you should have a moderate physical fitness level, and it includes a walking course into the Third Tunnel.
What happens if weather or visibility is poor?
The tour requires good weather. If it’s canceled due to poor weather, you’ll be offered a different date or a full refund.
Are there shopping stops?
The tour is described as no shopping, with a focus on the main DMZ sites.
What if I cancel?
You can cancel up to 24 hours in advance for a full refund. If you cancel less than 24 hours before the start time, the amount paid is not refunded.